Lost Sock Creations

Lost Sock Creations
what it's all about...
Showing posts with label Picasso. Show all posts

Thursday, May 30, 2019

Everyone is an Artist


Picasso said, 
"Every Child is an artist".
Why stop there. Keep going, don't let that feeling go. 
Remember the days when you didn't care what people thought about your art?
Go back to that. 
There are different avenues of art. 
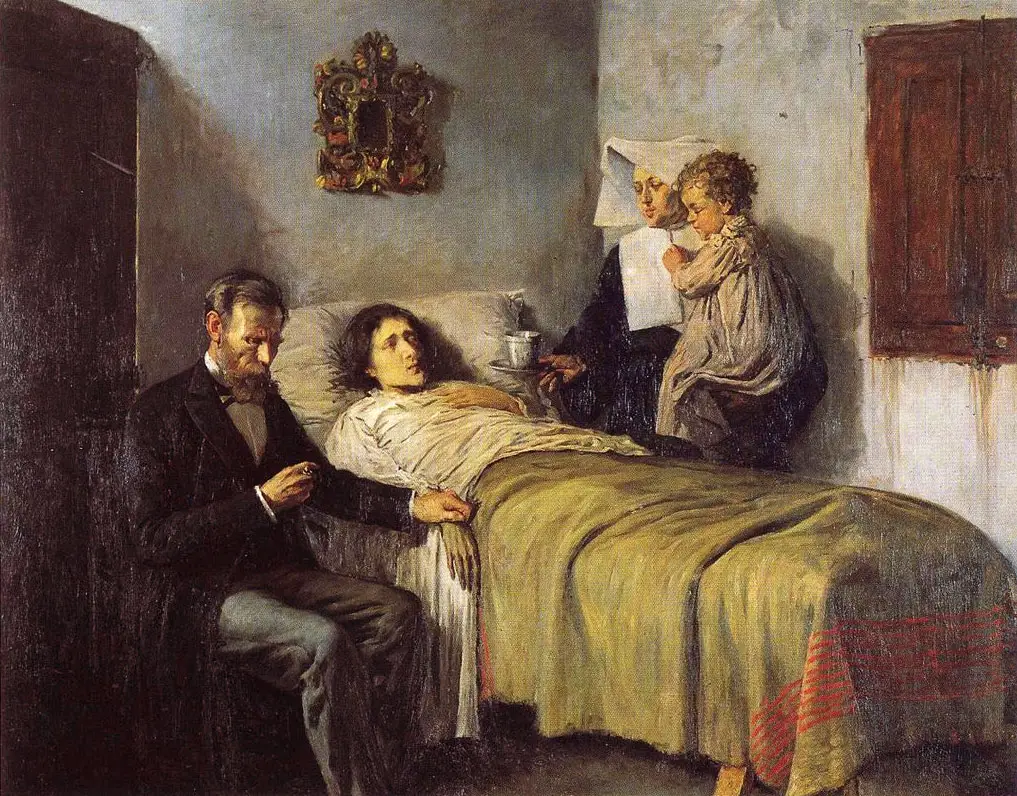
Picasso was a master artist at a very young age.
See..
Pablo Picasso. Science and Charity, 1897
Picasso at 15 painted this...

Self Portrait, 1971 by Pablo Picasso
One of Picasso's lasts paintings in 1971

This is proof that you don't have to fit a mold of perfection. Perfection is boring. 
Have fun, like Picasso. He was a big kid. His are was fun. He was experimental. 

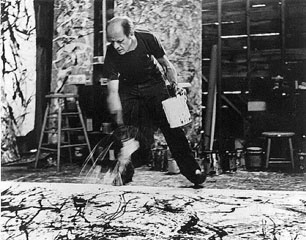
Or be like Jackson Pollock! He had fun with splatter paint. 
He used the colors to show his emotions. He used gravity and force to control his drops. 
He was having fun and being expressive. 
SO should you. 
Namuth - Pollock.jpg
Image result for jackson pollock most famous artwork
The end of Picasso's quite goes like this... 
"The Problem is how to remain an artist once we grow up."
Solution, DON"T GROW UP! 
Create like a kid, or at least when it's time to create, go back to the ideas you had when you were a kid. Go into your "art zone", escape the world, be free to do it your way. 

Monday, January 7, 2019

Cupcakes with Matisse

Let's imagine we are entering the world of Henri Matisse. 
It is full of color, contrast, pattern, rhythm and.. 
FOOD! 
Let's imagine Mr. Matisse has invited us over for cupcakes and painting. 
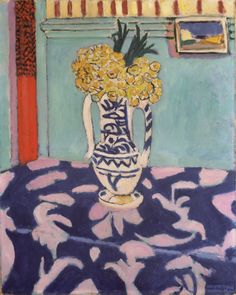
We arrive at his house to see a table set up with a colorful patterned cloth on it. 
The wall behind the table is also just as colorful patterned, but in a contrasting way. 


Get your Matisse coloring sheet here on Teacher Pay Teacher 
https://www.teacherspayteachers.com/Product/Henri-Matisse-quote-color-page-4340525

Watch educational videos about Matisse here...
Here, Mati and Dada teach kids about how important wild color was to Matisse. Click here...https://www.youtube.com/watch?v=2LXbXwTueBE 

---------------------------------------------------------------------------------
Mrs. Browning's cupcakes 
Carissa, McKenzie, Eden, 
Gus, Kynslee, Emma, 
Addison, patience & Nevaeh


Mrs. Hansen's kinder class
Abby, Joshua, Simon, 
Emma, Sophia & Hazir 


Johnny, Jaxton, Lucy, 
Lilly, Madison & Matt
from Gilbreath's kindergarten class

Mr.s Clarke's Kindergarten class
Emmas, Abel, Noah, Ely, 
Kylie, Stormi, Sophia & Kaleb. 


Begin the Background.
Fold the white paper in half (hamburger fold). 
Explain the foreground (table) and background (wall). 
Encourage kids to use contrasting patterns and colors to make 2 different areas of the painting. 
We painted our background with tempera cakes.


 You can also use 2 pieces of contrasting colored construction papers to use. 
1 for the wall and 1 for the table. 
Crayons can be used to ad pattern to the paper. 
We used a white paper doily for a fancy setting for our cake to come later. 
I got this idea from Cassie Stephens's donut lesson. 
See here...
https://cassiestephens.blogspot.com/2015/04/in-art-room-time-to-make-donuts.html

Then, get manilla sheet of paper that is 1/4 size of the backpaper. 
Turn it vertical and show students how to draw the cupcake. 
Start with pencil and then outline with permanent black 
maker. 

These two below were done with crayons and marker only...

This one below was done with crayon detail and tempera cake paint over 
(crayon resist method). 


Cupcakes were then cut out an glued down onto doily. 
Some scrap paper was used to cut up pieces of colored paper for sprinkles. 
Perfect for a February Valentine's Day display. 

My daughter Maddy made this in Pre-K. 
It took me 4 years to get this lesson together. 


Monday, September 14, 2015

Picasso Rooster

Pablo Picasso
1881-1973
Picasso in his studio...
 
Genius artist as a boy...
Photo of Picasso at 15 years old...
Picasso Painting at age 14

Picasso Painting at age 56!


PIcasso Rooster 1938
Step by Step Drawing
Used this image for refernce shapes
Image from
 
My step by Step drawing of the Rooster

Mrs.  Johnson's 2nd grade
 Practicing the Rooster

                      Redraw for Final on bigger colored paper
                                                
Adding color

Student Work


Mrs. Parker's 2nd grade
Anna Blair, Sophia, Julian & Emily
------

Mrs. Johnson's 2nd grade
Joseph, Allison, Musa, 
Reggie, Erin, Ria, 
Santiago & Joshua
-----------
Mrs. Craig's 2nd grade
Malachi, Jazayah & Sophia
-------------
Mrs. Russel's 3rd grade
Brianna, Bryan, Kai& Gianna
Kenut
---------
Mrs. McMillian's 2nd grade
Ozzy, Chance, Addi & Danish
---------
Mrs. White's 2nd grade

Sarah, Melanie, Hailey, 
Valerey, Angel & Emma
-------
Mrs. Mathai's 3rd grade
Bryce & Tam
Cheylah, Zoey, Austyn & Heila
-------------

Finished with color... but it needs to be kicked up a nothch.

So....
Adding in black crayon outline to any spots that got hidden.
EMPHASIS! Make it stand out, loud & proud.

Can't just do one!
__________________________________________________________________________
Mrs. Celestine's 3rd grade/ Thursday 
Hailey, Jasmine, Gabby...
Michael & Makayla
  Mrs. May's 3rd grade /Wednesday 
Paola & Maisy
Kolby, Kayla & Christian
Gavin & Adalene
Lucian & Justice (Reimer's)
Stained Glass alternative
Lightly draw rooster onto paper with pencil.
Outline rooster with Permanant Black Martker.
Divide big epen sections off with boxy shapes. Outline these with permanant marker as well.
 
Use Crayola markers to outline inside each shape with the color you would want it to be.
Try to use a variety of that type of color to make it more interesting.
For example,
Instead of one blue for the sky, use multiple kinds of blue or even add in another color that is closely related to blue (purple).


Close look at outline...
can add in additional small dots to shapes that are larger.
You will see why later...


using a variety of greens in grass...


WIth a small pointy brush and cup of water, trace the edges of shapes with water and pull ink inward to fill in shape. THis makes it look translucent like glass. THe extra dots of for the larger shapes to get additional ink needed to fill in more solid.
Continue until completed with water.
 
See the same technique from a differnt assigment here... using washable marker watercolor...
https://www.youtube.com/watch?v=oZHSyRyKlqU&index=19&list=PL4AE49DD6487CE892

VIsual Image Reference to lesson
I am not claiming any below images as LostSock images...
only for purpose of art education.


Stained glass is divided into small shapes or sections and
connected together like a puzzle with black lead.