RObin Mead is an amazingly adventurous artist that I have newly discovered.
She inspires me to be experimental with new techniques.
see more of her work on her blog page here...
http://www.insightsandbellylaughs.com/
______________________________________________________________
I have used some methods that I remind me of Robin Mead's pictures.
THis is using what I know to get me the results I desire...
1. CREATING A BACKGROUND
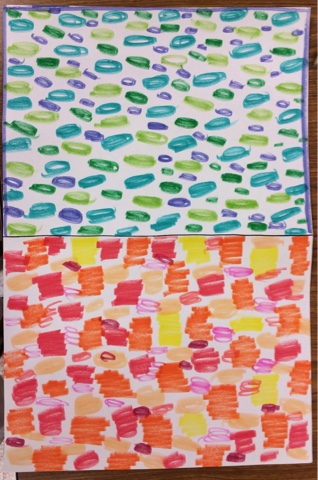
using markers (non permanant) make a design in the background.
I have used big dots, plaid lined, random doodles...
lots of designs work. The key is to keep your lines close together so that when we apply water later the ink will spread out further.
BIG DOTS
RANDOM DOODLES
concentric circles, zig zag
VERTICAL SCRIBBLE
APPLY WATER
Using a wet brush, start from top to bottom using a circular motion to move color around.
Mrs. Meleski's the grade class working (above)
complete the full paper with water brush and let dry...
Results for BigDot and Random Doodle designs below.
You can use colors to draw in more designs if desired. I would not do so much thought that it completely hides all past marker design. Be careful not to go overboard.
COLLAGE STYLE
~~~~~~~~~~~~~~~~~~~~~~~~~~~~~~~~~~~~~~~~
Use a half size sheet to pencil draw case, flowers and leaves on.
It's ok if objects go off page.
When glued down, you will just glue them going off page.
Remember to go light till you got it right.
The harder you draw, the harder to erase.
Go over with black permanent marker.
You can also exclude the flower vessel and just draw plants so that it looks like they are growing from the ground.
OUTLINE the objects with colored MARKERS you want them to be filled in with.
p.s. it's ok if you get out of the lines (YAY) cause it will be cut off later anyways.
Fill them in with a water brush...
See a clip of how to do the color here...
http://www.youtube.com/watch?v=EErNYg6k7do
Cut out each object.
* Try to keep as much of the sharpie black line as possible. It helps with emphasis.
Arrange and glue down onto background paper you created earlier.
The pieces you drew off the page need to be glued off the page.
Add Detail.
Draw in stems or any bugs you want .
MARKER ON MARKER METHOD
THis is a more transparent look to the end result.
I like it a little cause it shows you how colors effect eachother when they are overlay-ed.
---------------
Plaid Posies
You can do plaid or any other design as long as you try to 80% fill the background up with color. the 20% will be filled in when the wet brush is applied.
Applying the wet brush.
(same as above project)
Draw in the flowers with black permanent marker.
Color in the flowers with more marker.
-----
Using BIG DOTS instead of Plaid background for the
MARKER ON MARKER METHOD
Check out this video on YouTube:
Using a circle motion to
water down the marker.
http://youtu.be/Cd6MtOub3b0
Alternative dry Method
With construction paper, scrap colored paper, markers, peeled crayons, scissors and glue.
1. Use the side of peeled crayons on construction paper to give background texture.
2. Use across to draw flowers and leaves. Cut out and glue down.
3. Draw stems from ground to flower and any desired grass on bottom.
4. Use colored markers to draw more flowers, leaves, grass or to color in parts of picture.
-----
Mrs. Meleski's 4th grade
Albin & Ava
Coke, Noah & kaitlyn
Skyler, Innaya & Abbey
Brianna
-----
Mrs. Clanton's 4th grade
Katelyn, Jade & Madison
Sean, Caesar & kaylee
Maura & Katie
----------_
Mrs. Mahan's 4th grade
Envy, Izzy, Avee & Sydnie
Taylor, Daniel, Ethan & Gregory
-----------
Mrs. Do's 4th grade
Destiny & Makayla
Ava & Armondo
Adrianne, Devyn,
Ava & Shannon
--------------
Mrs. Hall's 4th grade
(Abby, Aniyah, Talyn,
Jekovia & Sam)
(Michael,
London, Violet,
Ashlynn & Kelly)
(Rebecca)
-----------
Mrs. Johnson's class working
James working even with broken wing....
Unstoppable creativity!!
Ashton, Andrea, Kyle,
James & jalynn
Annabelle, Jon & kaylee
Jackson (above)
-----------
Mrs. Warren's 1st grade working
Jett & Justin(above)
Victoria, Molly, Andrew& Cristina
(Above)
--------
1st grade
Mrs. Groth's class
Gabriella, Kaden & Landon
Mrs. McGinley's 1st grade class
Alyssa, Clayton & Isaac (above)
Jaden & April (above)