Lost Sock Creations

Lost Sock Creations
what it's all about...
Showing posts sorted by date for query watercolor blobs. Sort by relevance Show all posts

Sunday, September 14, 2025

Lava Lamp


Fall 2025 Advanced Art Students at Mineola High School 


4 THINGS TO NOTICE:
-Form of lamp is symmetrical
-The cap and base are shiny/metal:
showing highlights with value in correct direction.
-Blobs are 3D-ROUND with lighter area at bottom and darker area on top.

Watch it in Action
How does this happen?

It's Science...


GROOVY SCIENCE 


Convection and convection currents describe the process where heated, less dense fluids (like air or water, rise, while cooler, denser fluids sink.creating a continuous cycle of circulation that transfers heat. This natural phenomenon drives significant Earth processes, such as weather patterns like wind and storms, ocean circulation, and the movement of tectonic plates through mantle convection.
How Convection Currents Work
Convection Current Experiment - The Homeschool Scientist
  1. Heating and Expansion: When a part of a fluid is heated, its particles move faster and spread apart, becoming less dense.
  2. Rising: This warmer, less dense fluid rises to the surface.
  3. Cooling and Sinking: As the fluid rises, it cools, becoming denser again.
  4. Cycle: The cooler, denser fluid then sinks, creating a continuous cycle of rising and falling fluid known as a convection current.


Create a shape for your lamp. 
It should be symmetrical, have a top cap, bottom base, and glass bottle middle. 
What color combo do you want to use? 
The light comes from the bottom of the lamp base, so consider this when color blending and using value. 


UNIQUE DESIGN IDEAS
Challenge your creativity by transforming your wax blobs into shapes, objects, or letters. 


Each student must creatively problem solve by choosing
the paper and medium they want to make their idea come to life. 

CRITERIA:
-LAMP FORM (25 points)
Symmetrical and filling up space
Show entire lamp (not cut off).
*hint- you can make a stencil from other paper, 
folding in the middle to make it symmetrical. 

-VALUE ON CAP/BASE (25 points)
Make metal top and bottom appear shiny with contour line. 
D, M, and L areas.

-Round, color blended, same light source on all (bottom of lamp).
At least 3. 

-Ideas- color blending, radiating lines, blobs in background, 
*the more space you fill with lamp, the less BG you will have to do. 

YOUR CHOICE OF MEDIUMS-
marker, colored pencil, crayon, watercolor, oil pastel. 
Colored or white paper.

-SHINE ON GLASS (optional)
-Glass has a white highlight from surrounding lights, 
unless the lights around lamp are off. 


Tuesday, September 17, 2019

Contour Line Rainbow Blobs


Alexander 6th grade
(above)

 1st Period Art 2019
Ruben, Ambria, Jason, 

Desiree, Yuka & Katie

2nd Period Art 2019
 Janette, Saphyra, 
Chris, Lucy, 

Isac, Caroline,

Moses & Chance

 3rd Period Art 2019
Maxx, Caroline, 

Bailee, Josilen,

Kaylee, Brooklyn, 
Danielle & Ethan

4th Period Art 2019
Krissie, Brian, Riley, 
Jackie, Brooke & Alisia 

8th Period Art 2019
Breanna, Makena, Preciosa, 
Tania, Marco & Chevelle


9th period Art 2019
Nathalie, Maiyah, 
Jamya, Jorja & Luke
-------------------------------------------------------------------------------------------------------------------------

I found inspiration for this project from the art teacher
2art.chambers 
on Instagram. 
She always has fun colorful things for her class to do.
Here is her website as well...
I wasn't really sure of her method of doing the project, so I did a little experimenting of my own. 
Using a combination of watercolor and marker with water 
I ended up having a similar 
(but not so brilliant) result. 


Begin with 8 circles drawn in pencil in varying sizes.
Some may go partially off the paper.
We will experiment with 2 methods of watercolor and use 4 for each type. 


How I started the circles. 

TECHNIQUE 1

Fill in the entire circle with water from a brush. 
Get watercolor on the brush and drop/dot colors into the circle all around
 and they will expand outwards. Use ANALOGOUS colors that will blend well and that are next to each-other on the color wheel
This watercolor technique is called wet on wet. 

SEE VIDEO

results After the WET ON WET watercolor drop method. ..


TECHNIQUE 2

Now, time for the second type of watercolor technique... 
MARKER WASH. 


Video with marker dots only. 
Apply large dots of marker to the remaining circles leaving a little wiggle room for them.
Continue to choose ANALOGOUS colors that blend well. 
They should be about the size or a skittle or a peanut M&M. 
Use a wet brush to swirl the colors together. 

-------------------------------------------------------------------
Trial and Error... Critiquing and Tweeking..

Because my original wet on wet watercolor was not as brilliant as hers,  
I added marker dots when it was dry and went over the marker with a wet brush to make it expand. 

After adding marker and water...


---------------------------------------------
adding
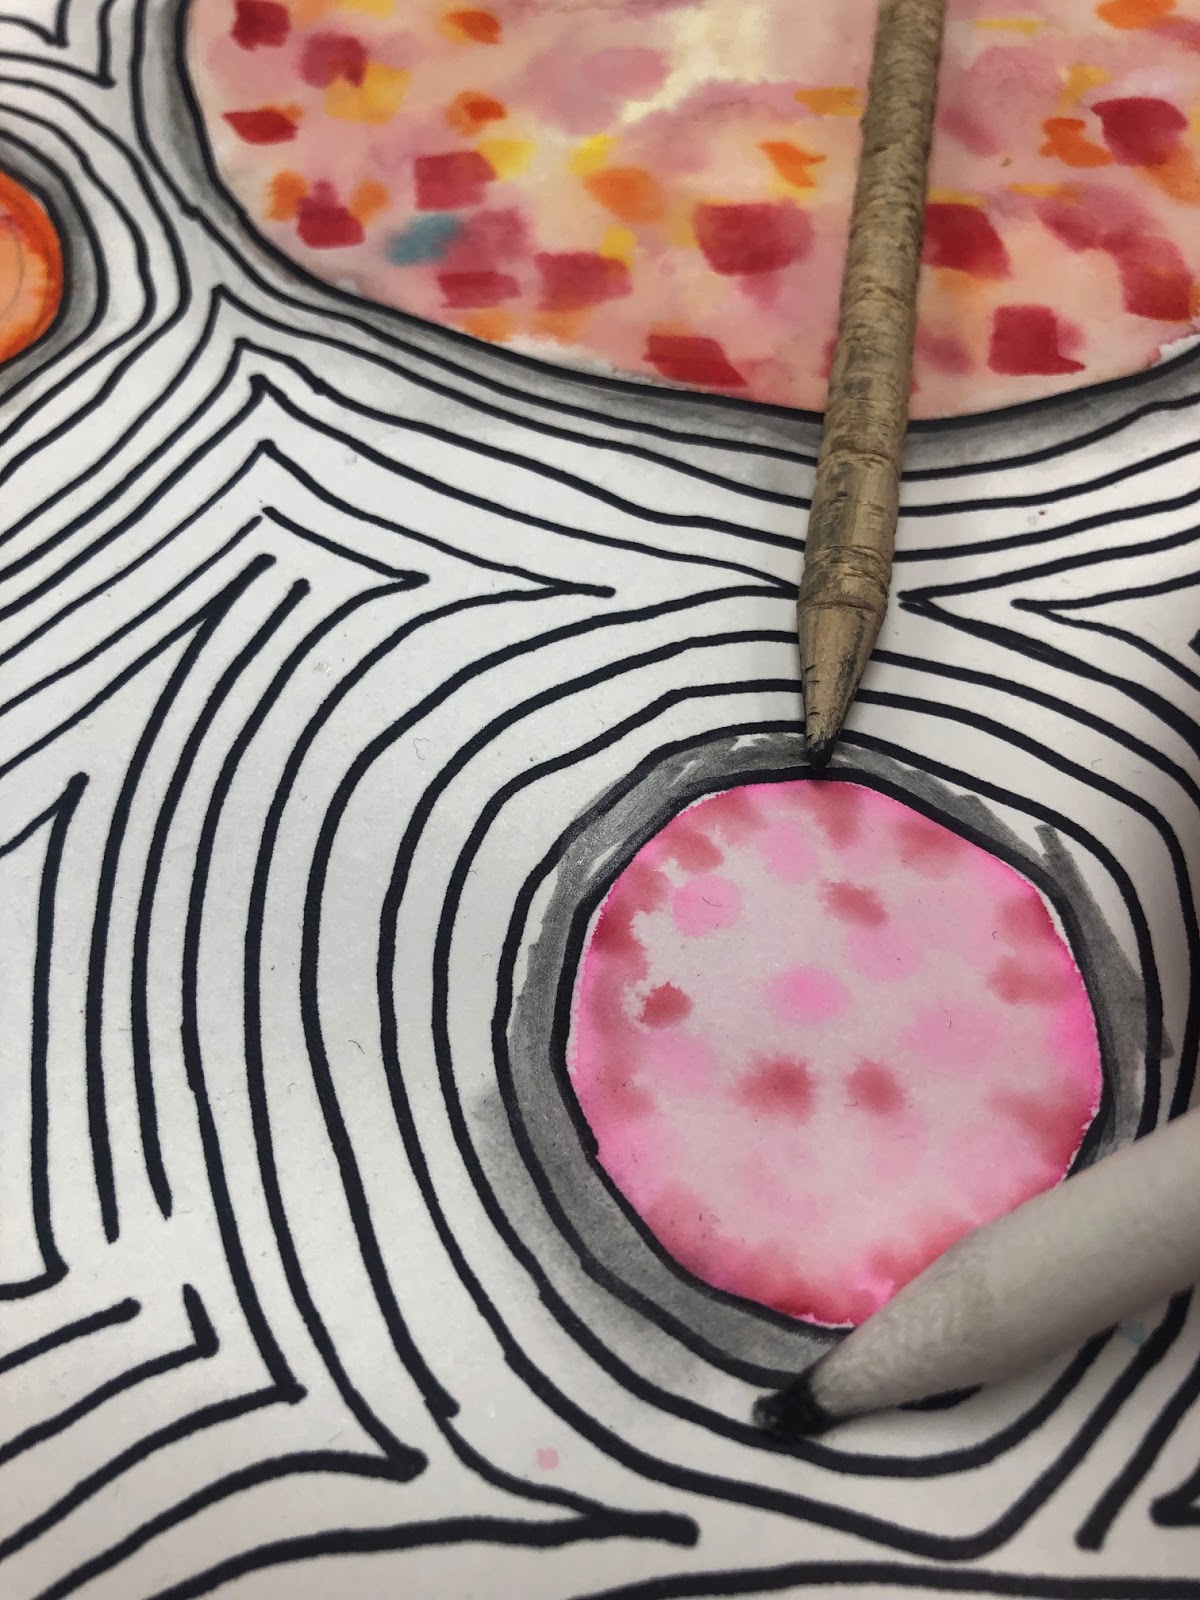
CONTOUR LINE
After the water is dry, begin tracing the circles. 
Stay with their shape, even if it got a little off the circle. 
THis makes the outcome more interesting. 
Contour line is used in different areas of life. 
It is used for topography maps and in drawing. 
Topography
Drawing
Our CONTOUR LINES will resemble that of the Typography Map. 


Continue outlining until the black circle is about to touch another circle or line. 
If this happens, do not touch them, but use the same line to go around the other circle as well 
(like an "8" that does not touch in the middle). 

Continue doing this until it is filled up with lines that bend around each circle. 
This is called CONTOUR LINE> 


Alexa adding shadow with blendy stump. 


Then, using a pencil and a shading stump, add a shadow around each circle.