Look at the photo above..
Tell me what you see.
What changes when things get further?
This is called ATMOSPHERIC PERSPECTIVE.
This cool mountain-scape is perfect for showing how atmospheric perspective works.
As space recedes, value usually decreases and details diminish.
This can be more prominent in foggy, snowy, or rainy weather.
John MacTaggart
Tzu Ching Chen
Dan Dressler Art
Desertscapes
Gravity Falls uses a lot of atmospheric perspective tricks to make the scenery appear to be full of space...
Take Notes:
STUDENTS PLANNING
Finished pieces
Art 2
Art 1
Plan on Index Card or Draw in Journal (bigger than hand).
Before we PAINT,
we PLAN.
1. Find your idea for your landscape. You will need to commit to your choice, so pick wisely.
Go to Google Images and type in "Atmospheric Perspective Landscape"or be more specific
"Atmospheric Perspective Forest"
2, Draw a Landscape (sky and land) with layers (foreground, middle-ground, and background).
-make sure front layer has details, is dark, and bigger.
-keep background layer simple, light, and small.
4. Use ONE COLOR of colored pencil to color in your layers.
Use more pressure in foreground and less in background.
Add details to the front layer with a marker in the same color.
(see example above from journal)
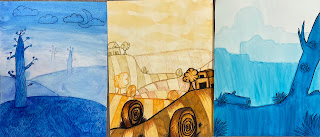
This is one of my examples for teaching the lesson on how to achieve Atmospheric Perspective.
1. pencil draw a landscape having the 3 different layers of depth
(front, middle, back, and also sky).
2. They then have to choose 1 color only, monochromatic, to use on the entire picture.
Using a fine colored Sharpie, they trace the front layer in that chosen color
and adding details to the front layer only.
Using an ultra fine colored Sharpie, they then trace the second layer in the same color with less or no detail.
The back later will stay in pencil only.
3. Then students use tempera cakes or watercolor pencils to add the value variety.
Shade the sky in lightly with the color chosen,
the 3rd layer slightly darker,
2nd later slightly darker,
and the front first later the darkest.
After shading with the watercolor pencil, they use a wet brush to go over each later individually. The final step is to use a regular colored pencil to add in some shading onto the front layer only to achieve depth, space, and detail in the front.
To do this watercolor painting, you need to know how to do 2 different WASHES.
HOW TO CREATE A FLAT WASH
HOW TO CREATE A GRADED WASH (value scale)
Try it with
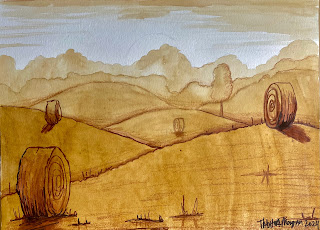
Coffee Grounds!!
Advanced Art
This takes practice.
Make a value scale to get the hang of how much
grounds and water.
Start with a light pencil drawing of your scene.
Remember to use layers of the landscape with objects getting smaller in distance.
ONce you have gotten to bottom, as dark as you can go,
you can use brown marker or colored pencil to get shaper details in the front layer.
Progression photos...
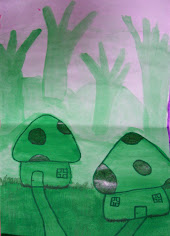
STUDENT EXAMPLES BELOW
7th and 8th grade Mineola Middle School
TEMPERA PAINT
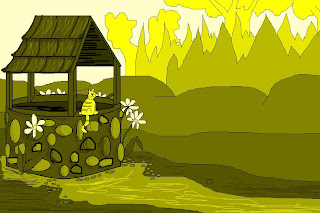
This assignment can be done as well on the Microsoft Paint as an alternative.
I have done this as a follow up after they were done with the one in the art lab.


.jpg)


.webp)
.jpg)


.jpg)


