Lost Sock Creations

Lost Sock Creations
what it's all about...

Monday, January 30, 2017

MusiCubism

We read the book
"Pablo Picasso, Breaking all the Rules"
and looked at his "blue" period, collage and the invention of Cubism.


Image result for Picasso guitarRelated imageImage result for Picasso guitar

This project encompasses many parts of Picasso's life, art style and art subjects. 
Above by Picasso (Cubism, Blue Period, and Collage)

____________________________________________________________________

 
4tg grade artist above
 
KinderGarten artist above 


Sunday, January 29, 2017

Aboriginal Dot Animals


Mrs. Rylander's 4th grade class
Hailey, Brittney, 
Elloise, Kayla, Regan, 
Gavin & Anonymous 
............................................................................................

I began with this video with the students
https://www.youtube.com/watch?v=5lMEr1EDurU&t=9s
and this...
https://www.youtube.com/watch?v=AoHAn58-_rg
to give then a background on the people, subjects, and methods of Aboriginal Paintings.

Begin with a neutral background paper for your dot art.
Aborigines make their art on pieces of bark or wood, so this color paper will be the most authentic looking.
Draw the shape of an animal that is original to Australia on black paper.
Turtle, Fish, Snake, Koala, Wombat, Platypus, Kangaroo...
Cut out shape and glue onto neutral paper.
 
Using colored pencils, begin using dots to surround your animal with a line of dots in one color.
Repeat dots around this line with another color. Continue this until you are comfortable with branching out into another design.
Here is a site that shows a variation of designs based on
Aboriginal Spirituality
 
 
Each dot should be the size of about the end of a pencil eraser or a popcorn kernel.
Patterns work well when using the dots.
Contrasting colors next to each other look nice too. 
 

Optional Tempera Paint
 

I
 
 Explanation of Aboriginal art and beliefs.
Dream Time Stories
Beliefs
They came from the earth/dirt and will return to earth/dirt.
The earth it their mother.
They share a soul/spirit with the earth.
People do not own land, the land owns people.
People are equal with animals and
are obligated to look after the land and animals.

Monday, January 23, 2017

Chinese Flower Vase


Cherry Blossoms in Blue Willow Vase
by Tabitha Morgan

Watch the story of the legend of the
Blue Willow Love story here... 


Mrs. Russell's 3rd grade class

Erin, Katie, Musa, 
Hailey P. , Maddie, Sophia, 
Shelby, Hailey, Trent

--------------------------------------------------------------------------------
Mrs. May's 3rd grade class

-------------------------------------------------------------------
Mrs. Celestine's 3rd graders
Addison, Tonie & Jullissa

What is Blue Willow pottery?
The history of China's Willow Pattern. The Chinese fable of an eloping couple transforming into doves became of one the most identifiable design elements of 18th and 19th century crockery, known as the Willow Pattern. ... The design was printed on a transfer which was applied to the plate before firing.


Draw and Design the Blue

Willow Vase
1. Draw a SYMMETRICAL vase.
Fold white paper in half. With fold to right, draw the left half of the vase shape that you want. Outline the pencil line with black marker. Trace while folded at a light box or window onto the blank right side of paper.
Now, fill in your vase shape with designs that mimic the Chinese culture:
Dragons, Bird, Flowers (specifically cherry blossoms), Landscape, Fish, Architecture, Patterns, Designs... much more.

To get design ideas and images for the Ming Vases, look here

https://www.google.com/search?q=ming+vase&safe=strict&espv=2&biw=1517&bih=654&source=lnms&tbm=isch&sa=X&ved=0ahUKEwiuy4T02djRAhVI0WMKHaiEDHkQ_AUIBigB

2. Lightly draw your design onto your vase shape with a pencil.


Outline your design with a black marker to add EMPHASIS.


Color Scheme- Monochromatic/Tints and Shades of Blue.
Using a variety of blues in a variety of mediums, color your design leaving the background white. 
Adding FORM with shading, using a pencil and blend stump. 
Use pencil to shade around the inside left, right and bottom of the vase. 
Use the paper blend stump to smooth out the pencil shading. 


Fold white paper (twice the size as vase) in half. Draw a black line with sharpie. 
Make a design using only warm colors on one side. 
Make a design using only cool colors on the other side. 
Buy this poster here! 
https://www.teacherspayteachers.com/Product/Warm-and-Cool-Poster-2955992

Using tempera cakes (love these!)

Let Dry...

Glue Ming Vase onto paper. It does not matter if warm or cool is at top. 
Use your artistic judgement. 

Draw branches with a black crayon coming out of the vase. 
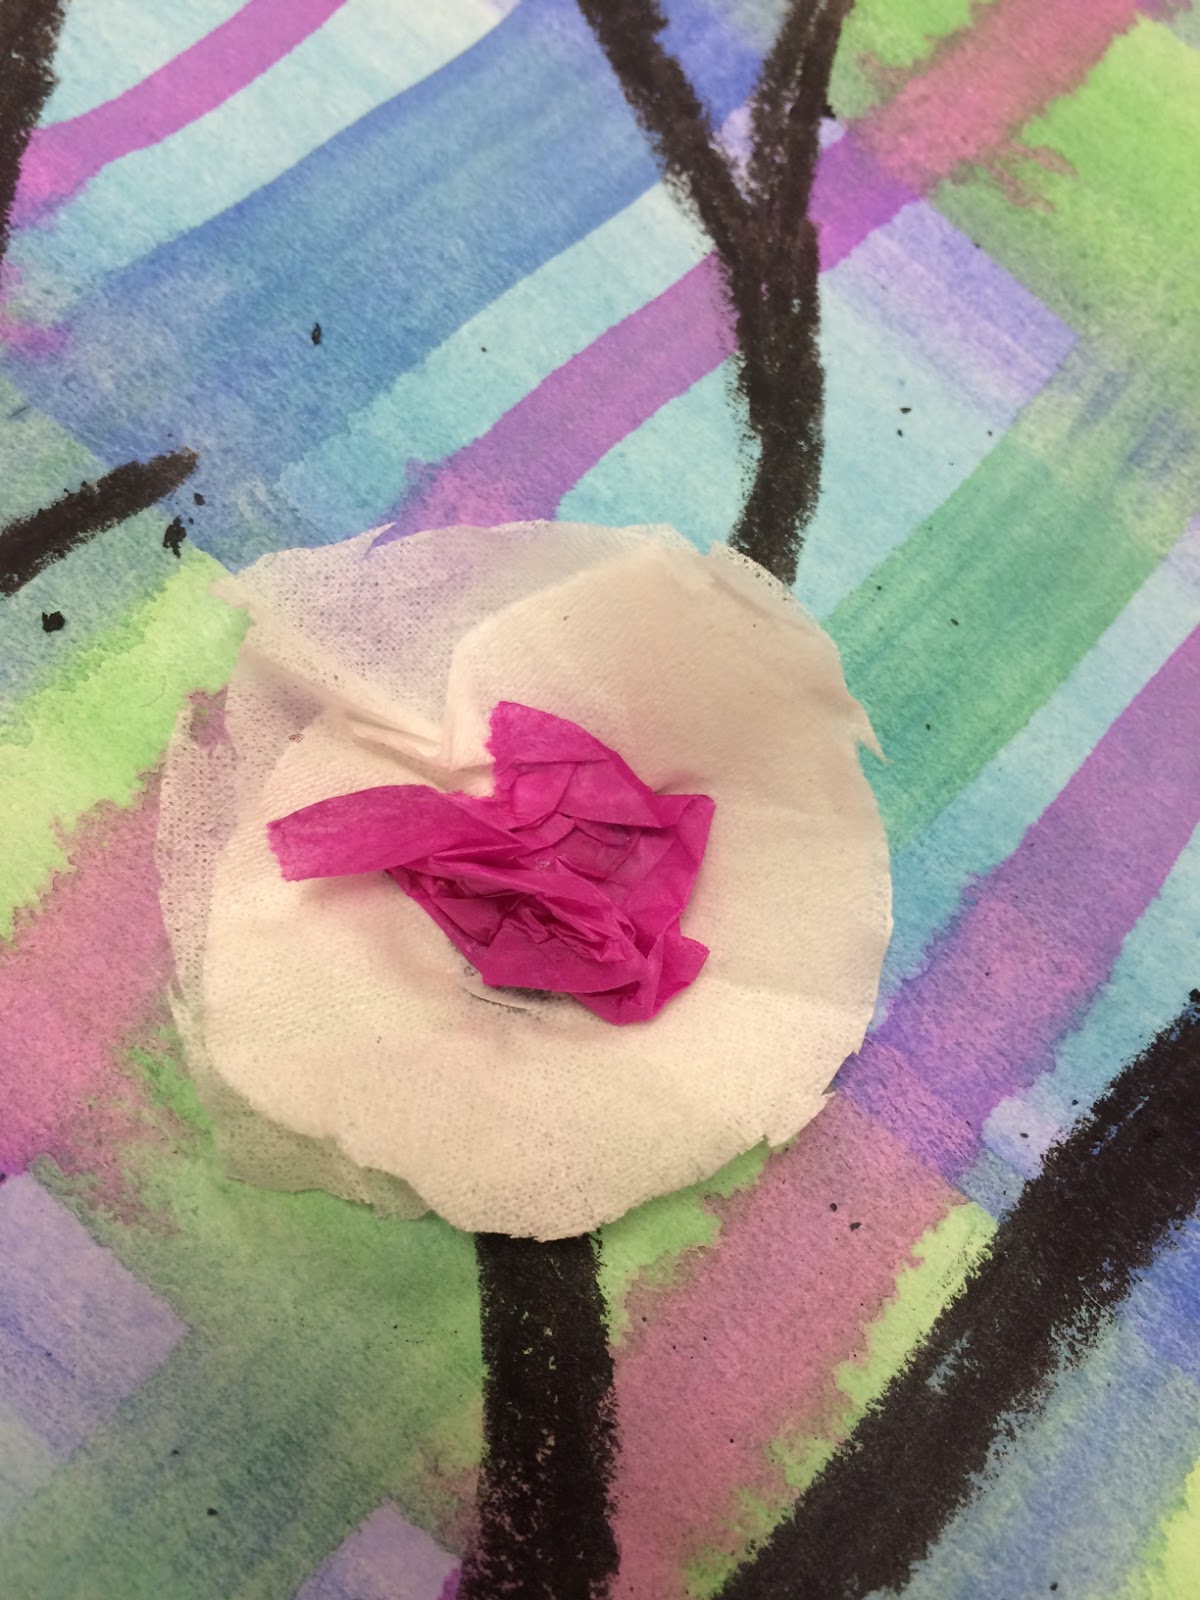
TISSUE FLOWERS

Use two circles of white tissue paper stacked on top of each other for white petals. 
Glue down center to a branch. Glue will seep through when held down for 5 seconds.
crumble up a pink or red small piece of tissue. Glue to center of white petals. Hold for 5 seconds. Use red marker to add small dots around the white petals. 


YOU ARE DONE!


Three Dimensional Version


Found this inspiration from Cassie Stephens blog... see here.
https://cassiestephens.blogspot.com/2014/04/in-art-room-ming-vase-still-life-with.html

Or see a different type of pottery lesson here on my blog...
http://tabithaannthelostsock.blogspot.com/2013/02/ancient-pottery-designs.html