


Photo References
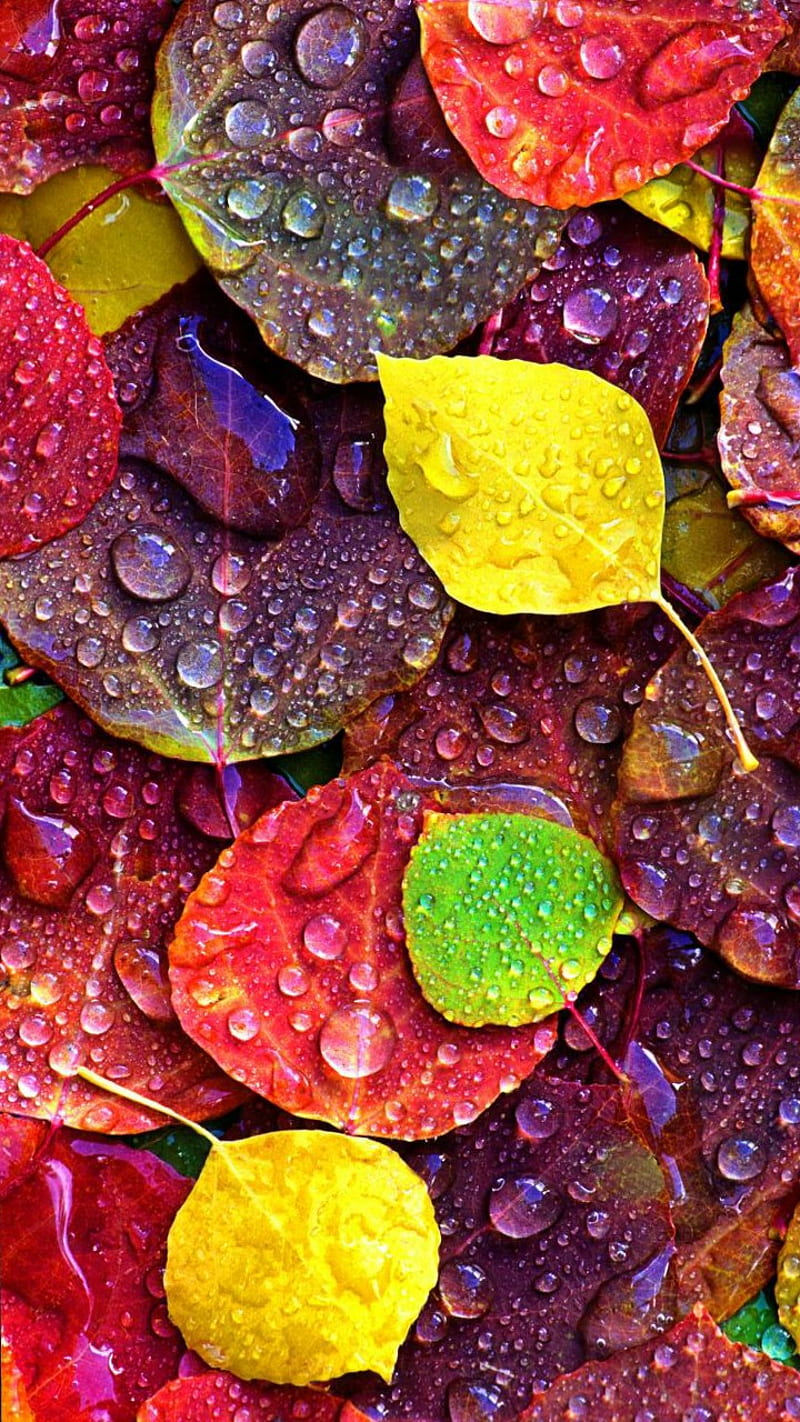
This time of year, leaves are falling everywhere.
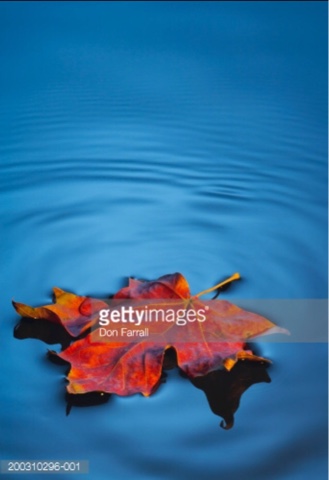
When they fall on the water, it creates ripples.
Study how the ripples form around the contour of the leaf.
See how they slowly disappear?


Study the leafs on the water in photographs above.
Watch videos of ripples below.
-Take notes of your observations.
PRACTICE
-Practice drawing a variety of leaves.
-Practice Drawing repeated round shapes around the leaves to mimic the ripples.
-Practice blending colors to look like Warm colored Fall Autumn leaves.
Practice creating VALUE with cool colors on the water.

Practice Worksheet example.


HOW DO YOU DRAW A LEAF?
They are symmetrical.
They are all shapes.
They have a stem that pushes out veins
that travel to tip/s of leaves and branch off.


STUDY RIPPLES
What colors are in water ripples?
What shapes?
Here is what ONE object does to the water...
Here is what multiple objects does to the water...


CHALLENGE
Water Drop on Leaves OR Leave Below Surface

How would you do these?
SECONDARY LEVEL
(7-12th grade)
Begin with practicing color blending...
Know VALUE
Know- Warm, Cool, Analogous colors.
Tints and Shades (of blues)
Concentric Circles- repeating outward from common center

https://tabithaannthelostsock.blogspot.com/2025/02/color-blending.html
Lightly with pencil, Draw 3 to 5 Leafs on top of the water...


Outline with Black Permenant Marker.


2. COLORING LEAVES
Color blend at least 2 colors,
using Crayons using the
--DARKER COLOR first (create value).
--Add second lighter color,
go HARD over the entire leaf.

Choose analagous or tint/shades of warm colors.
Make sure one is darker than the other.


If doing a three color blend, use darker colors first, then lightest color last.


3. PAINTING
Good news, (if you went hard enough)
the crayon will RESIST the paint,
so you do not have to worry about the paint getting in/on the leaves.
IF you have leaves UNDER the water, paint those first. They can be smaller, less detail, and blurry.
Then add, ripples radiating out of the contour.
Eventually they will collide or disappear.


*Here I used crayon lightly (instead of paint) to do the leaves under the water before I painted.

If you feel better drawing the ripples in first, you can.
Use cool color paints to go around leaves with rounded contour shapes.
Leave areas of white to show reflection at top of ripple .


USE REFERENCES


Start painting…


Art 1


Advanced Art
was challenged to used whatever mixed media they felt comfortable with.
They were able to use collage, colored pencil, crayon, pastels, watercolor.


Student Art Gallery
Eduardo M. 10th grade

Josie H. & Zane S.


Davis P.

Selena, Avery, Ava S.


ELEMENTARY LEVEL
2-6th grade

Cut out 3-5 WARM colored leaves.
Fold paper to make symmetrical.

 Glue onto large COOL colored paper.
Add a cast shadow around leaves with dark cool color.
It must be darker than the paper to look like a shadow.

Begin using white, dark and light cool colors to repeat the shape of the leaf to mimic ripples.
Each time you go outward, begin rounding off the edges. Ripples are round, not pointy.
Also, you can begin spreading out distance of ripples and you go outward.


 Construction paper crayons could work well, but I used regular too.


 Stripes, dots, scribbles, pattern, design...

Psssst! It's ok to get out of lines with your scribbles... We will cut it out next.
 6. After done filling with color,

7. Glue it down... Remember, Just a dot, not a lot.


 4. Get out the 6 rainbow colors;


Quicker Kinder lesson
 Mrs. Zarrlla's class

Jade, Mrs. Fortner's class
Sites of Inspiration

If you want some leaves to appear as though they have sunk below the surface, draw those lighter and color them in (before the ripples) with colored pencil. They should look darker and faded.


-----------------------------------------------------------------------------------------------------------------------
Alba-GOlden Elementary 2018
Mrs. Gaines 2nd grade class
Bella, Lilly, Kaylee, chase,
Adam, Joline, Landri, Carson,
Jaylyn, Luciyan , Lilly r. & Mia
Adam, Joline, Landri, Carson,
Jaylyn, Luciyan , Lilly r. & Mia

Mrs. Parrish's 2nd grade class
Rusty, Ethan, Madison,
Addy, Aiden, Bradyn,
Dorthy, Ava & Maddy

Mrs. Nivison's 2nd grade class-
Maddy, Katelyn, Eli, Adaya,
Rylee, Allyie, Hannah, Kelton,
Evan and khloe

-----------------------------------------------------------------
Mrs. Goforth's 2nd grade Class-
Faith, Kyler, Abigail, Destiny,
Leo, Jocee, NoName, Maggie,
Corbin & Nicole

From Krahn Elementary, KLEIN ISD
Mrs. Jamison's 2nd grade
Martin, Sara, Daniela,
Trent, Laila & Aayan
--------
Mrs. Russell's 3rd grade
Kenut, Kai & Jayden
Brianna, Maci, Christalynn,
Channing, Anonymous Artist 1 & 2
-----------
Mrs. McMillian's 2nd grade
Lauren, Christopher & Addison
-------------
Mrs. White's 2nd grade
Mystery girl, Desmon, Hailey...
Sarah, Kayla, Emma & Mystery Artist.
----------------
1st grade Autumn Leaves
Mrs. McGinley's class
Meredith, Alyssa,
Ava, Joseph,
Chau & GiGi
--------------
Mrs. Johnson
Kaylee & Ashton
Trustin, Alexis, Andrea & AnnaBelle
-------------
1st grade Autumn Leaves
Baxton, Mark, Luke...
Payton, Peyton, Gabriella, Kaden
Landon, Hazel, Jessalyn & Kais.
-----------
2nd grade Autumn Leaves
Mrs. Craig
Sophia, Malachi, Kelci & Janiya
This is a simple low maintenance project for Fall.
Students will learn about cool and warm colors, shape, line, concentric circles, and will be using cutting and pasting skills,
1. Draw a leaf large on white paper with pencil
2. Use warm colored markers to add patches of color inside shape.
3. Outline leaf with black marker.
4. Cut along black line.
5. Using cool colored markers, make a dot and draw circles around the dot that keep going on.
Repeat all over page. Fill up all space.
6. Glue warm leaf onto cool rippled water.
7. Optional. Add a shadow around leaf with black or blue crayon.
----------_------------
Variation of assignment
1. Use a cool construction paper color with cool crayons + black & white.
2. Begin drawing concentric circles with a cool crayon...,
Mrs. Craig's students working hard...
3. Fill in spaces with more cool colors. Draw more concentric circles on other open parts of paper.
Stop when you hit another concentric circle.
4. Draw leaf step by step on warm colored paper.

5.Use warm colors in patchy scribble boxes all over leaf. Fill it up!
HINT: If the first leaf proves too difficult for some, I did have kids turn the paper over on draw two simpler & smaller shaped leaves.
(See Below)
Then they choose which side they like better & outline/color those.
Whatever floats your leaf 😉
Psssst! It's ok to get out of lines with your scribbles... We will cut it out next.
CUT IT OUT carefully!

1. No running with scissors
2. No pointing scissors at people.
3. Always hold tip down
4. Close when done.
5. Cut away from you instead of towards you.
6. ONly cut paper, not hair, clothes, friend's hair or friend's clothes.
7. Glue it down... Remember, Just a dot, not a lot.

use the dots of glue around the edges so its not flopping around.
8. Shade with dark blue around edges to imply shadow on water under the leaf.
Reference Images
Ripples are a great example of concentric circles and cool colors!
I like the shadow cast under the leaf.
Beautiful contrast of cool water and warm leaf.
Easy 1 day lesson
Complimentary color leafs
1.
2.
3.
Red, orange, yellow,
Green, blue, violet.
Color the 3 leaves in rainbow order;
Red, orange, yellow....
Then the backgrounds in the next 3 colors...
Green, blue, violet!
Crayons
Jacob, ?, Samuel,
Natalie, Aidan & Skylar
Jade, Mrs. Fortner's class
This site has GREAT step by step leaf drawing for younger artists.
And
This site inspired the ripple idea behind the leaves.
Videos about the Fall Season
Why do Trees SHed thier Leaves?


